Introduction
I watched the tutorial for IFC.js, but I found the guidelines a bit complex with me to follow. That's why I decided to create a straightforward demo to demonstrate how to use IFC.js with webpack. In this tutorial, I will guide you through the process of creating a basic IFC.js viewer using webpack and even show you how to deploy it on GitHub Pages 🤧.
I think top my issue is I can't use tutorial with difference platform(Windows-Linux-MacOs) and how can I make it easier for management. For any people not familiar with ifc, please read acticle How To Learn IFC

My aim is to make this tutorial simpler than many others you might find on the internet, ensuring that it's easy to grasp and implement. So, let's get started!
What Is Webpack?
Webpack is a module bundler for JavaScript applications. It takes modules with dependencies and generates static assets representing those modules. Webpack is a tool that allows you to bundle your JavaScript code into a single file. It's also known as a module bundler because it bundles all of your modules together into one file. Webpack can be used with any JavaScript framework or library, including React, Angular, and Vue.js.
Install
With Windows
If you are using Windows, it's a good idea to set up a Windows Subsystem for Linux WSL to create a Linux environment. This will make it easier to install and run Linux commands on your Windows machine. It will be better if you know how to use the command line and manage your system.
- Install WSL: First, install WSL by opening your command prompt or PowerShell and running the following command:
wsl --installNote
It can take a few minutes to complete the installation process. and you need to set up your username and password for your Linux environment.
- Configure WSL:
Once WSL is installed, set it to use the second version. Open your command prompt or PowerShell and run:
wsl --set-default-version 2Note
This process can ignore because WSL 2 is the default version.
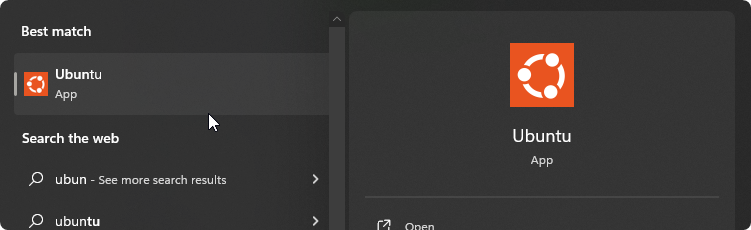
After completing this setup, you should see Ubuntu available in your Start Menu.
Now, let install bun which is an all-in-one toolkit for JavaScript and TypeScript apps. Bun is distributed as a single executable named bun, making it fast, user-friendly, and easy to install.
Use the following command to install Bun on your WSL system. Run this command from within your WSL environment:
curl -fsSL https://bun.sh/install | bash # for macOS, Linux, and WSLBy following these steps, you'll have a Windows Subsystem for Linux (WSL) set up and ready to work with Bun, making it easier to manage and develop your JavaScript and TypeScript applications.
You need install Visual Studio Code to work with this project. You can download and install it from here.
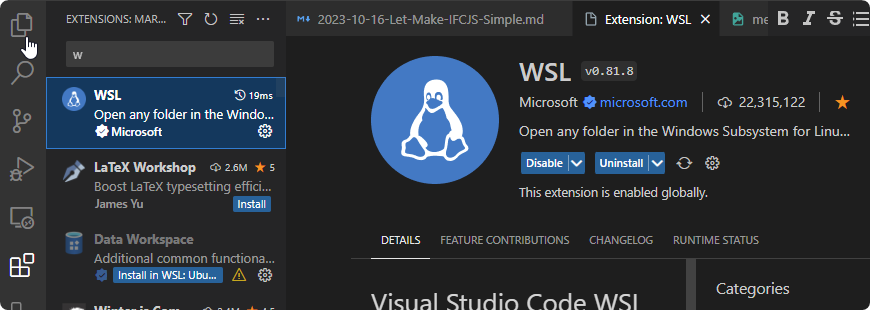
And install extension WSL Remote for Visual Studio Code to work with WSL.
With Linux or Macos
If you are using a Linux or macOS system, you can easily install bun, which is an all-in-one toolkit for JavaScript and TypeScript apps. Bun is distributed as a single executable called bun, known for its speed, user-friendliness, and straightforward installation process.
To install Bun on your system, open your terminal and run the following command:
curl -fsSL https://bun.sh/install | bash # for macOS, Linux, and WSLThis command will download and install Bun, making it accessible for your JavaScript and TypeScript development needs.
Same with Windows, you need install Visual Studio Code to work with this project. You can download and install it from here.
Create Your Project
Let's open visual studio code from command :
code .Note
If you are using Windows, you need to open your project folder from WSL. You can open your project folder from WSL inside Visual Studio Code use command Crt+Shift+P and type :
WSL: Connect to WSL
Then, you can do the same with Linux or macOS.
Start by opening your terminal inside visual studio and following these steps to create your project:
- Create a New Folder and Initialize Your Project:
In your terminal, run the following commands to create a new directory for your project and navigate into it:
mkdir learn-ifcjs
cd learn-ifcjs- Clone the Repository Template:
Clone the project repository template to your newly created project folder by executing the following command:
git clone https://github.com/chuongmep/ifcjs-webpack.git- Change to the Project Directory: Navigate into the ifcjs-webpack directory, which contains the template you've just cloned:
cd ifcjs-webpack- Install Dependencies:
Install all the necessary project dependencies using the following command:
bun install- Run the First Example: To see your project in action, run the initial example:
bun run startThis sequence of commands will set up your project, clone the template, install the required dependencies, and execute the first example to get you started.
Now, you can view the results in your web browser by accessing the local host. Visual Studio Code may automatically open a new browser tab for you to explore. You can also load an IFC file from your local computer to see the results.
For reference, you can access the live version of the project at https://chuongmep.github.io/ifcjs-webpack/.
Here's a live preview of the project, you can try download ifc file and load it to your viewer at Sample-Test-Files
Feel free to explore the project and test it with your IFC files.
Back to the project, this is some file you need to explore:
src/main.js: This is the main file of the project, which contains the code to load the IFC file and render it in the browser.src/index.html: This is the HTML file that contains the canvas element to render the IFC file.src/style.css: This is the CSS file that contains the styling for the canvas element.src/web-ifc.wasm: This is the WebAssembly file that contains the code to render the IFC file in the browser.src/web-ifc-mt.wasm: This is the WebAssembly file that contains the code to render the IFC file in the browser.package.json: This is the package file that contains the project dependencies and scripts.webpack.config.jsThis is the webpack configuration file that contains the configuration for the project.
Deploy IFc.js Web Viewer
Create a New Repository on GitHub:
Go to GitHub and log in to your account.
Click the "+" sign in the top right corner and select "New repository."
Name your repository "ifcjs-webpack," or use the same name as your project folder.
Optionally, add a description and choose other settings as desired.
Click "Create repository."
Initialize and Push to GitHub: In your project directory, run the following commands to initialize your repository and push your code to GitHub. Replace
urlwith the URL of your GitHub repository:
git init
git add .
git commit -m "first commit"
git branch -M main
git remote add origin <url>
git push -u origin mainThis will initialize a Git repository, add your project files, create an initial commit, set the branch to "main" (or "master" if you prefer), and link your local repository to the GitHub remote. Finally, it pushes your code to the GitHub repository.
Your project is now hosted on GitHub, and you can access it by visiting the URL of your GitHub repository. Now let's do next step to deploy it on GitHub Pages.
Since IFC.js is a static website, it can be easily deployed to GitHub Pages. The following steps will guide you through the deployment process:
- Build the Project: Run the following command to build all the project files into the dist folder:
bun run buildThis command will generate the necessary files and assets for deployment.
- GitHub Action Setup: o automate the deployment process, you can use Bun to set up a GitHub Action. This action will automate the deployment process to GitHub Pages. The command used to run the project locally will be included in the github action file file.
name: NodeJS with Webpack

on:
  push:
    branches: [ "master" ]
  pull_request:
    branches: [ "master" ]

jobs:
  build:
    runs-on: ubuntu-latest
    steps:
    - uses: actions/checkout@v3

    - uses: oven-sh/setup-bun@v1

    - name: Build
      run: |
        bun install
        bun run build
    - name: Deploy to GitHub Pages
      uses: peaceiris/actions-gh-pages@v3
      with:
        github_token: ${{ secrets.GITHUB_TOKEN }}
publish_dir: ./distTada, you can see the result from your repo https://<username>.github.io/<your-repo-name>/ same with my repo https://chuongmep.github.io/ifcjs-webpack/
Webpack Configuration
In file example, I use webpack to bundle all the files into a single file. You can see the configuration file here. This file contains the following configuration:
mode: This is the mode of the project. It can be either "development" or "production." In this case, we are using "development" mode.entry: This is the entry point of the project. It can be either a single file or an array of files. In this case, we are using a single file.output: This is the output of the project. It can be either a single file or an array of files.devtool: This is the source map of the project. It can be either "source-map" or "eval-source-map." In this case, we are using "source-map."devServer: This is the development server of the project. It can be either "webpack-dev-server" or "webpack-dev-middleware." In this case, we are using "webpack-dev-server."module: This is the module of the project. It can be either "rules" or "loaders." In this case, we are using "rules."plugins: This is the plugins of the project. It can be either "plugins" or "loaders." In this case, we are using "plugins."
Let's quickly go through each of these configurations:
const path = require('path');
const HtmlWebpackPlugin = require('html-webpack-plugin');
module.exports = {
    mode: 'development',
    entry: {
        bundle: path.resolve(__dirname , 'src/main.js')
    },
    output: {
        path: path.resolve(__dirname, 'dist'),
        filename: '[name].js',
        clean: true,
        // assetModuleFilename: 'wasm/[name][ext]'
    },
    devtool: 'source-map',
    devServer: {
       static: path.resolve(__dirname, 'dist'),
       port: 3001,
       open: true,
       hot: true,
    //    watchFiles: true
    },
    module: {
        exprContextCritical: false,
        rules:[
            {
                test: /\.css$/,
                use: ['style-loader','css-loader']
            },
            {
                test: /\.png$/,
                type: 'asset/resource',
                generator:{
                    filename: 'img/[name][ext]'
                }
            },
            {
                test: /\.wasm$/,
                type: 'asset/resource',
                generator:{
                    filename: 'wasm/[name][ext]'
                }
            }
        ]
    },
    plugins: [
        new HtmlWebpackPlugin({
            template: path.resolve(__dirname ,'src/index.html'),
            title:'IFC.js',
            filename:'index.html',
            // inject:false
        })
    ]
}Conclusion
I hope this tutorial has helped you understand how to use IFC.js with webpack. If you have any questions or comments, please leave them below. I will be happy to answer them for you!
Some time, I look my process is easy, but some time people feel it's hard to follow. So, if you feel it's hard to follow, please follow again the IFC.js tutorial 😂
Additional Resource
I think now you can explore cli with repo : https://github.com/ENG-Mazri/cli-ifcjs, it must be easier for you to use IFC.js with cli. And also, you can explore more about IFC.js with some repo: